
Bruno SRE-2010 Installation Manual: A Comprehensive Plan
This manual details the SRE-2010 stairlift’s installation, covering safety, tools, electrical needs, and troubleshooting for a secure, functional setup.

The Bruno SRE-2010 Elite Stairlift represents a significant investment in accessibility and independence. This manual provides comprehensive guidance for installers, ensuring a safe and correct installation process. Understanding the system’s components, from the rail to the drive mechanism, is crucial. Proper installation guarantees optimal performance and longevity.
This guide details everything from pre-installation assessments to post-installation checks, referencing the operator’s manual for user safety. It’s designed for professionals familiar with basic electrical and mechanical principles, prioritizing user well-being.
Understanding the SRE-2010 Elite Stairlift

The SRE-2010 Elite features a robust rail system, a comfortable and secure seat, and a reliable drive mechanism. Key components include the motor, gear system, and safety sensors. Familiarity with these parts is essential for successful installation and maintenance. The stairlift’s design prioritizes smooth operation and passenger safety, incorporating features like obstacle detection and emergency stop functionality.
Referencing the operator’s manual alongside this installation guide provides a holistic understanding of the system’s capabilities and limitations, ensuring a quality installation.
Safety Precautions Before Installation
Prior to installation, disconnect the main electrical power supply to the staircase. Always wear appropriate personal protective equipment (PPE), including safety glasses and work gloves. Ensure the staircase is structurally sound and capable of supporting the stairlift’s weight and user load. A qualified electrician should handle all electrical connections.
Never attempt installation if you are uncomfortable working with tools or electricity. Review the operator’s manual for specific safety warnings and guidelines to prevent injury or damage.
Required Tools and Materials
Essential tools include a drill with various bits, a level, measuring tape, adjustable wrench, screwdrivers (Phillips and flathead), and a socket set. Materials needed are mounting screws, bolts, washers, wire connectors, electrical tape, and appropriate wiring for the electrical connection. A stud finder is crucial for secure rail mounting.
Additionally, have a multimeter for electrical testing and a conduit for wire protection. Confirm all components match the parts list in the installation manual before beginning.
Checking Package Contents
Upon delivery, carefully inspect the SRE-2010 package for any shipping damage. Verify all listed components are present: the rail sections, seat assembly, drive system, power supply, wiring harness, and mounting hardware. Cross-reference the included parts list with the actual contents.
Note any discrepancies or missing items immediately and contact Bruno customer support. Retain all packaging materials until the installation is complete and verified. A complete inventory prevents delays during installation.
Pre-Installation Site Assessment
Before beginning, thoroughly assess the staircase. Ensure sufficient headroom exists throughout the entire travel distance, both at the top and bottom landings. Confirm the staircase structure is sound and capable of supporting the stairlift’s weight and dynamic loads.
Identify any obstructions along the path, like doors or low-hanging fixtures. Verify the availability of a suitable electrical outlet near the upper landing, meeting the specified electrical requirements.
Measuring the Staircase
Accurate measurements are crucial for a proper installation. Begin by measuring the total length of the staircase, from the lower to the upper landing. Record the width of the staircase at various points, noting any narrowing or irregularities.
Determine the angle of the staircase; this impacts rail curvature. Measure the height of the rise and the depth of the run for each step. Document all measurements precisely, as these will dictate rail customization and overall fit.
Electrical Requirements
The Bruno SRE-2010 requires a dedicated 120V, 15-amp electrical circuit. Ensure the outlet is easily accessible for servicing and is grounded according to local electrical codes; A qualified electrician should perform all electrical connections.
Avoid using extension cords or adapters. Verify the circuit breaker is appropriately sized and readily identifiable. Proper grounding is essential for safety and optimal performance of the stairlift’s drive system and safety features.
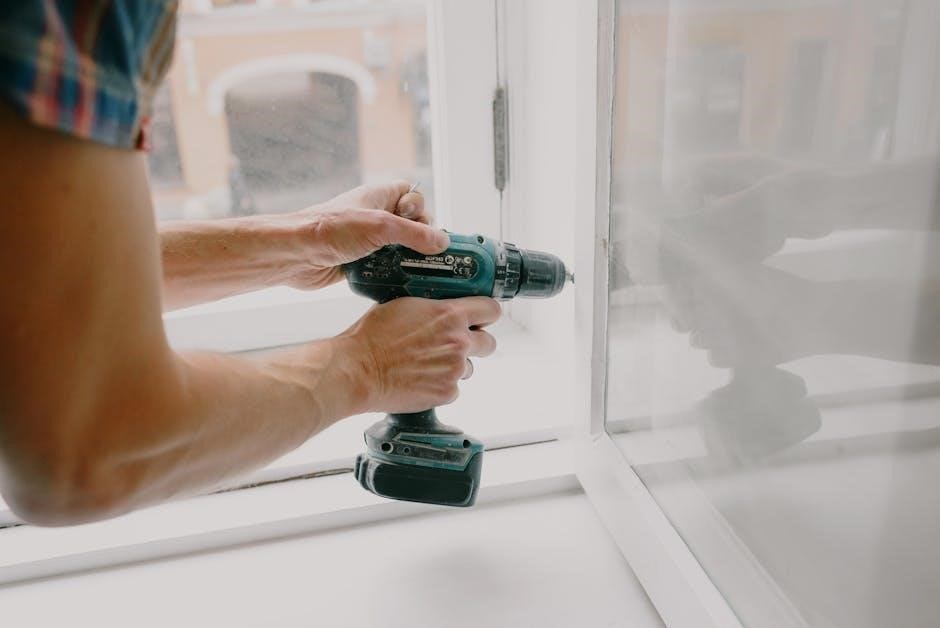
Installation Steps: Rail Installation
Begin by unpacking the rail sections and hardware, carefully inspecting for any shipping damage. Position the lower rail bracket at the staircase’s base, marking the mounting points accurately. Securely attach the lower bracket using appropriate lag bolts, ensuring a firm foundation. Repeat this process for the upper bracket, maintaining consistent alignment.
Connect the rail sections, verifying a smooth, continuous path. Use a level to confirm horizontal alignment throughout the installation. Proper rail installation is crucial for safe and reliable stairlift operation.

Mounting the Rail to the Stairs
Utilize the pre-drilled holes in the rail brackets as guides for drilling pilot holes into the staircase structure. Employ lag bolts of the correct size and length, ensuring they penetrate deeply into the stair’s framing for maximum support. Tighten the bolts progressively, avoiding over-tightening which could damage the wood.
Double-check bracket stability after tightening. Confirm the rail remains level and securely fastened to the stairs. A properly mounted rail is fundamental for the stairlift’s safety and smooth operation.
Ensuring Rail Alignment
Precise rail alignment is critical for smooth, safe stairlift operation. Use a level to verify the rail’s horizontal and vertical alignment along the entire staircase length. Address any deviations immediately by loosening the mounting bolts and making necessary adjustments.
Employ a string line as a visual guide to confirm a straight rail path. Inspect for any bends or twists that could impede the carriage’s travel. Proper alignment minimizes wear and tear, ensuring longevity.
Installation Steps: Seat and Drive System
Carefully lift the seat assembly and align it with the rail, ensuring the rollers engage smoothly. Securely attach the seat to the carriage using the provided bolts, tightening them to the manufacturer’s specified torque. Next, connect the drive system, verifying proper gear mesh and cable routing;
Double-check all connections for tightness and stability. Confirm the seat swivels freely and the footrest folds and unfolds correctly. Proper installation of these components is vital for safe passenger transport.
Attaching the Seat to the Rail
Begin by carefully positioning the seat assembly onto the installed rail, aligning the mounting brackets with the designated slots. Ensure the rollers within the seat carriage properly engage with the rail’s track for smooth movement. Secure the seat using the provided hardware – bolts, washers, and nuts – tightening them incrementally in a crisscross pattern.
Verify the seat is firmly attached and doesn’t exhibit any wobble or instability. Confirm the swivel function operates freely before proceeding to the next installation phase.
Connecting the Drive System
Carefully connect the drive motor assembly to the seat’s carriage, aligning the gear mechanisms precisely. Ensure the drive belt is correctly tensioned, avoiding slippage or excessive strain. Attach the safety brake mechanism, verifying its proper engagement with the rail during power outages.
Double-check all connections for security, and confirm the drive system operates smoothly through a manual test before electrical activation. Proper alignment is crucial for optimal performance and safety.
Electrical Connection and Testing
Before connecting, verify the power supply matches the stairlift’s requirements. Connect the wiring harness, ensuring proper grounding for safety. Utilize a dedicated circuit to prevent overloads. Perform a voltage test to confirm correct power delivery to the motor and control systems.

Conduct a full functionality test, operating the stairlift through its complete range of motion. Inspect for any unusual noises or erratic movements, addressing issues immediately.
Wiring the Stairlift
Carefully route the wiring harness, avoiding pinch points and sharp edges. Connect wires according to the labeled diagram, ensuring secure connections. Utilize appropriate wire connectors and strain reliefs for durability. Double-check polarity before connecting to the power source, preventing damage.
Secure all wiring within the designated channels, protecting it from physical harm. Verify proper insulation and grounding throughout the system. Confirm all connections are tight and weatherproof, if applicable.
Initial Power-Up and Functionality Test
After wiring is complete, cautiously apply power to the SRE-2010. Observe the control panel for indicator lights, confirming the system receives power. Test the call buttons at both ends of the staircase, verifying responsiveness. Slowly operate the stairlift through its full range of motion, checking for smooth, consistent movement.
Listen for unusual noises during operation, indicating potential issues. Confirm the seat rotates and footrest folds correctly. Ensure all safety features are active before proceeding.
Safety Feature Verification
Thoroughly verify all safety mechanisms of the SRE-2010. Test the obstacle detection system by placing an object in the stairlift’s path, ensuring it halts immediately. Confirm the emergency stop button functions correctly, bringing the unit to a complete stop. Check the seatbelt operation, guaranteeing secure restraint.
Inspect the safety sensors along the rail, validating their responsiveness. Verify the stairlift doesn’t operate with the safety sensors compromised. Document all test results for future reference and compliance.
Obstacle Detection System Check
Crucially, the SRE-2010’s obstacle detection system must be rigorously tested. Place various objects – boxes, pillows, even a person (carefully!) – on the staircase within the stairlift’s travel path. Observe if the unit immediately and smoothly stops before contact. Repeat this test multiple times at different locations along the staircase.
Ensure the sensors aren’t obstructed or malfunctioning. Document any instances of failure and address them before proceeding. Confirm the system’s sensitivity is appropriately calibrated for safe operation.
Emergency Stop Functionality
Verify the SRE-2010’s emergency stop buttons – located on both the seat and potentially at stair ends – function correctly. Press each button firmly and confirm the stairlift halts immediately and securely. Test the reset procedure; it should require deliberate action, preventing accidental restarts.
Ensure the emergency stop overrides all other functions. Document any delays or issues with the stopping mechanism. Confirm the system’s responsiveness is consistent throughout the entire range of travel.
Troubleshooting Common Installation Issues
Addressing installation challenges is crucial. Rail alignment problems often stem from uneven mounting or incorrect measurements; re-check all dimensions and bracket placements. Electrical connection errors can cause malfunctions – verify wiring polarity and secure connections.
If the stairlift doesn’t power on, inspect the circuit breaker and wiring. Slow or jerky movement suggests drive system issues; examine belts and gears. Document all troubleshooting steps and resolutions for future reference.
Rail Alignment Problems
Misalignment during rail installation is a frequent issue. Ensure brackets are securely fastened to studs within the staircase framing, using a level for precision. Inspect for gaps between rail sections; tighten connections if necessary. Uneven staircases require careful shimming to maintain a consistent, smooth track.
Verify the rail’s slope matches the staircase angle throughout its length. Re-check all measurements and adjust brackets accordingly. Proper alignment prevents binding and ensures safe, reliable operation of the SRE-2010.
Electrical Connection Errors
Incorrect wiring is a primary cause of installation failures. Double-check all connections against the wiring diagram, verifying polarity and secure terminations. Confirm the power supply matches the SRE-2010’s voltage requirements to prevent damage. Loose connections can cause intermittent operation or complete failure; tighten all screws.
Test for continuity and proper grounding before powering on. Ensure the circuit breaker is appropriately sized for the stairlift’s load. Faulty electrical connections pose a safety hazard; consult a qualified electrician if unsure.

Post-Installation Checks and Adjustments
Following installation, thoroughly inspect the entire system. Verify the rail is securely mounted and aligned, ensuring smooth travel. Test the seatbelt operation and footrest adjustment for proper functionality and user comfort. Confirm obstacle detection and emergency stop features respond correctly.
Adjust the seat position for optimal ergonomics. Check battery charging and overall electrical performance. Address any minor adjustments needed for a safe and comfortable user experience. Document all checks and adjustments performed.
Seat Belt Operation
The SRE-2010 features a crucial seatbelt for passenger safety during operation. Ensure the belt retracts smoothly and locks securely when pulled. Instruct users to fasten the belt before each ride and remain secured throughout the entire journey. Regularly inspect the belt for any signs of wear, damage, or fraying.
A properly functioning seatbelt significantly reduces the risk of injury. Demonstrate correct usage to all potential passengers. Never operate the stairlift without the seatbelt engaged. Report any belt malfunctions immediately for repair or replacement.
Footrest Adjustment
The SRE-2010’s footrest is designed for comfortable and secure positioning. Ensure it folds and unfolds smoothly, providing adequate support for various foot sizes. Demonstrate to users how to adjust the footrest to their preferred position before commencing operation. Regularly check the folding mechanism for any obstructions or resistance.
Proper footrest adjustment enhances stability and prevents accidental slippage. Instruct passengers to keep their feet firmly on the footrest during the ride. Report any difficulties with the footrest’s operation immediately for maintenance.
User Training and Manual Review
Comprehensive user training is crucial for safe SRE-2010 operation. Thoroughly review the operator’s manual, emphasizing safety guidelines and operational procedures. Demonstrate all functions – call buttons, emergency stop, seatbelt, and footrest – ensuring complete understanding. Address any questions or concerns the user may have regarding the stairlift’s features.
Stress the importance of reading the manual before independent use. Confirm the user can confidently operate the stairlift and understands all safety precautions. Provide contact information for Bruno customer support for future assistance.
Operating Instructions
To operate the SRE-2010, use the paddle controls to initiate movement – forward for ascending, backward for descending. Ensure the seatbelt is securely fastened before each ride. Utilize the call buttons located at both ends of the staircase to summon the stairlift. Keep clear of the footrest and surrounding areas during operation.
Familiarize yourself with the emergency stop button for immediate halting. Never attempt to operate the stairlift with obstructions on the track. Refer to the operator’s manual for detailed instructions and safety precautions.

Safety Guidelines for Passengers
Always fasten the seatbelt before commencing travel on the SRE-2010. Do not exceed the maximum weight capacity specified in the manual; Keep limbs and loose clothing within the chair’s confines during operation. Avoid carrying objects that may interfere with the stairlift’s movement or pose a tripping hazard.
Never attempt to get on or off the stairlift while it is in motion. Supervise passengers who may require assistance. Familiarize yourself with the emergency stop function and its location.
Maintenance Schedule
Regularly inspect the SRE-2010 for loose bolts, worn components, and obstructions on the rail. Check the seatbelt for proper function and any signs of damage. Ensure the footrest folds and locks securely. Inspect wiring for fraying or damage, addressing issues promptly.
Battery maintenance is crucial; follow the operator’s manual for charging guidelines. Schedule a professional inspection annually to verify safety features and overall functionality, ensuring continued safe operation.
Regular Inspection Points
Prioritize inspecting the rail for dents, bends, or obstructions that could impede smooth travel. Examine the seat and its mounting hardware, verifying secure attachment and proper operation. Check the drive system for unusual noises or signs of wear, addressing any concerns immediately.
Inspect all wiring connections for tightness and insulation integrity. Verify the functionality of the emergency stop button and obstacle detection system. Ensure the footrest and armrests are secure and operate as intended.
Battery Maintenance
Maintain optimal battery performance by regularly checking the connections for corrosion and ensuring they are tight. Avoid deep discharging, as it can shorten battery life; recharge promptly when the stairlift is not in use for extended periods; Use only the specified charger to prevent damage;
Inspect the battery casing for cracks or leaks, replacing the battery if any are found. Follow proper disposal procedures for old batteries, adhering to local regulations. Consider a battery replacement every few years, depending on usage.
SRE-2010 Specifications
The Bruno SRE-2010 Elite stairlift boasts a maximum weight capacity of 300 pounds, ensuring safe transport for a wide range of users. Its overall dimensions are carefully designed for comfortable seating and efficient operation within standard staircases. The unit operates on a 24V DC power system, utilizing sealed lead-acid batteries for reliable performance.
Rail length is customizable to fit various staircase configurations, while the seat offers adjustable features for personalized comfort. Detailed technical specifications, including motor output and charging time, are available in the accompanying documentation.
Dimensions and Weight Capacity
The Bruno SRE-2010 Elite stairlift is engineered with user comfort and safety as paramount concerns. Its seat dimensions provide ample space, typically around 20 inches wide and 18 inches deep, accommodating various body types. Overall width, including armrests, is approximately 22 inches. The unit’s footprint is minimized to ensure it doesn’t obstruct the staircase.
Crucially, the SRE-2010 has a maximum weight capacity of 300 pounds (136 kg), a vital specification for safe operation. Proper adherence to this limit is essential for maintaining the stairlift’s functionality and preventing potential hazards.
Technical Specifications
The Bruno SRE-2010 operates on a 24V DC power system, utilizing sealed lead-acid batteries for reliable performance, ensuring operation even during power outages. Its drive system features a robust DC motor, delivering smooth and consistent movement along the rail. The maximum travel speed is approximately 60 feet per minute, providing efficient transport.
Furthermore, the stairlift incorporates an advanced obstacle detection system, enhancing safety. The rail is constructed from high-strength aluminum, ensuring durability and longevity. Standard features include a seatbelt and adjustable footrest, contributing to user comfort and security.
Warranty Information
Bruno offers a comprehensive warranty on the SRE-2010, covering essential components for a specified period from the original purchase date. The limited warranty safeguards against defects in materials and workmanship, ensuring peace of mind. Specifically, the structure, motor, and electrical components are typically covered for a longer duration.
However, batteries and cosmetic items may have a shorter warranty period; To initiate a claim, retain proof of purchase and contact Bruno Customer Support. Warranty coverage is voided by misuse, improper installation, or unauthorized modifications.
Coverage Details
The Bruno SRE-2010 warranty typically includes coverage for the stairlift’s structural frame, drive system, and essential electrical components. This protection extends to defects in materials and workmanship under normal use. However, wear-and-tear items like upholstery, armrests, and footrests receive limited or no coverage.
Furthermore, the warranty doesn’t cover damage resulting from improper installation, modifications, accidents, or neglect. Regular maintenance, as outlined in the manual, is crucial to maintain warranty validity. Review the full warranty document for specific terms and conditions.
Claim Procedures
To initiate a warranty claim for your Bruno SRE-2010, first contact Bruno Customer Support with your purchase details and a description of the issue. Documentation, including proof of purchase and installation records, is essential. You may be required to provide photos or videos demonstrating the defect.
Bruno will then assess the claim and, if approved, authorize a qualified technician to inspect and repair the stairlift. All claims are subject to verification and adherence to the warranty terms. Keep records of all communication and repair details.
Resources and Support
For immediate assistance with your Bruno SRE-2010, contact Bruno Customer Support via phone or email – details are available online. Extensive online resources, including frequently asked questions (FAQs) and downloadable manuals, are readily accessible on the Bruno website.
Additionally, a network of authorized Bruno dealers provides local support, installation services, and maintenance. These professionals can address specific installation concerns and offer expert guidance. Utilize these resources to ensure optimal performance and longevity of your stairlift.
Bruno Customer Support Contact
To reach Bruno Customer Support regarding your SRE-2010 stairlift, please visit their official website for the most current contact information. Typically, support is available via phone during standard business hours, offering assistance with installation questions and troubleshooting.
Email support is also often provided, allowing for detailed inquiries and documentation submission. Ensure you have your model number and purchase date readily available when contacting support for efficient assistance. Explore the website’s support section for self-service options.
Online Manuals and FAQs
Bruno provides readily accessible online resources, including downloadable SRE-2010 operators manuals in PDF format. These manuals cover safety, operation, and basic maintenance procedures. A comprehensive Frequently Asked Questions (FAQ) section addresses common installation concerns and troubleshooting steps.
Users can find answers to typical queries regarding rail alignment, electrical connections, and functionality tests. The online portal offers a convenient way to access information at any time, supplementing the printed installation guide and ensuring a smooth setup process.