

Nikon D3300 Owners Manual: A Comprehensive Guide
Welcome! This manual guides you through the Nikon D3300, offering insights from experienced users. Learn at your own pace, mastering exposure and settings for stunning results.
Begin with the exposure triangle – aperture, shutter speed, and ISO – to understand their interplay. Experiment with Aperture and Shutter Priority modes to gain practical experience.
Congratulations on choosing the Nikon D3300! This DSLR is a fantastic entry point into the world of photography, offering a blend of image quality, features, and user-friendliness. Many find it less intimidating than more complex cameras, making it ideal for beginners.
This guide aims to demystify the D3300, helping you move beyond “auto” mode and unlock your creative potential. Don’t be overwhelmed; learning photography is a journey. Start slowly, focusing on one concept at a time. Experienced users suggest mastering the exposure triangle – aperture, shutter speed, and ISO – as a foundational step.
The D3300’s simplicity is a strength. While it may lack some of the bells and whistles of higher-end models, it provides essential controls without unnecessary complexity. Embrace experimentation and enjoy the process of discovering what your camera can do!
Unboxing and Initial Setup
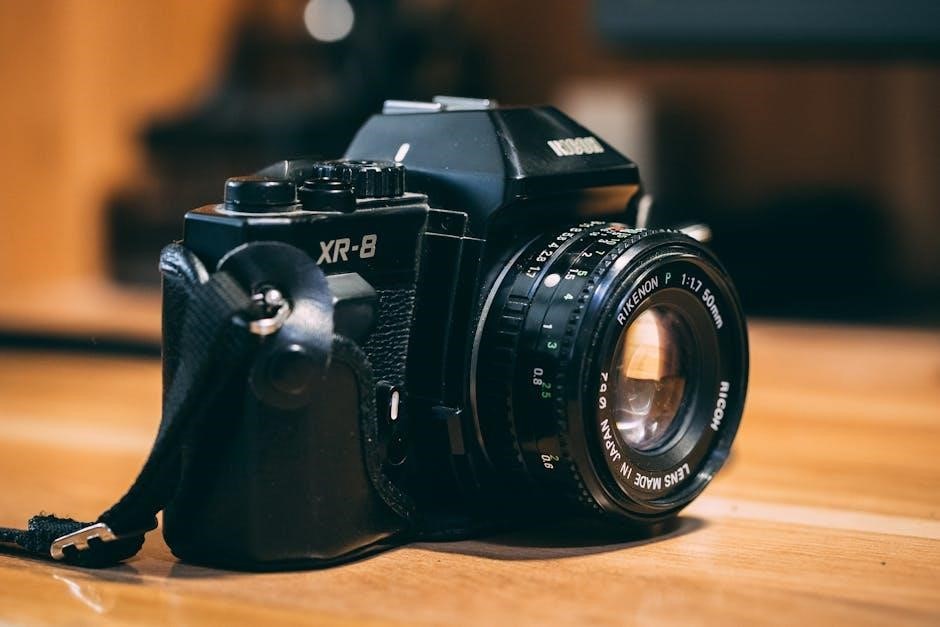
Carefully unpack your Nikon D3300 kit. You should find the camera body, the 18-55mm kit lens, a battery, battery charger, USB cable, strap, and various manuals. Inspect all components for any damage.
First, charge the battery using the provided charger – this typically takes a few hours. While charging, familiarize yourself with the camera body and lens. Once charged, insert the battery and a compatible SD memory card (not included). Power on the camera and follow the on-screen prompts to set the language, date, and time.
The initial setup will also guide you through basic settings. Don’t worry about perfecting everything now; you can adjust these later. Ensure the lens is securely attached before proceeding. You’re now ready to start exploring!
Understanding the Camera Body & Controls
The Nikon D3300 features a well-designed body, though some functions are a bit slower due to its beginner-friendly nature. Take time to locate key controls. The grip is comfortable, promoting stable handling. The camera isn’t overloaded with buttons, simplifying operation for newcomers.
Familiarize yourself with the placement of the shutter button, mode dial, and control dials. The rear panel houses the LCD screen, directional pad, and menu buttons. Understanding these elements is crucial for navigating settings and customizing your shooting experience. Don’t be afraid to experiment!

Refer to the following sections for detailed explanations of the top and rear panel controls, and a breakdown of each mode on the dial.
Top Panel Controls
The D3300’s top panel houses essential controls. The Mode Dial, a prominent feature, selects shooting modes – Auto, Program, Aperture Priority, Shutter Priority, and Manual. The Power switch activates the camera. The Shutter button initiates image capture.
You’ll also find the control dial, used for adjusting settings like shutter speed or aperture, depending on the selected mode. The microphone is positioned for audio recording during video. The flash hot shoe allows for external flash units. These controls provide direct access to frequently used functions, streamlining your workflow.
Take time to practice switching between modes and adjusting settings using the dial to build muscle memory.
Rear Panel Controls
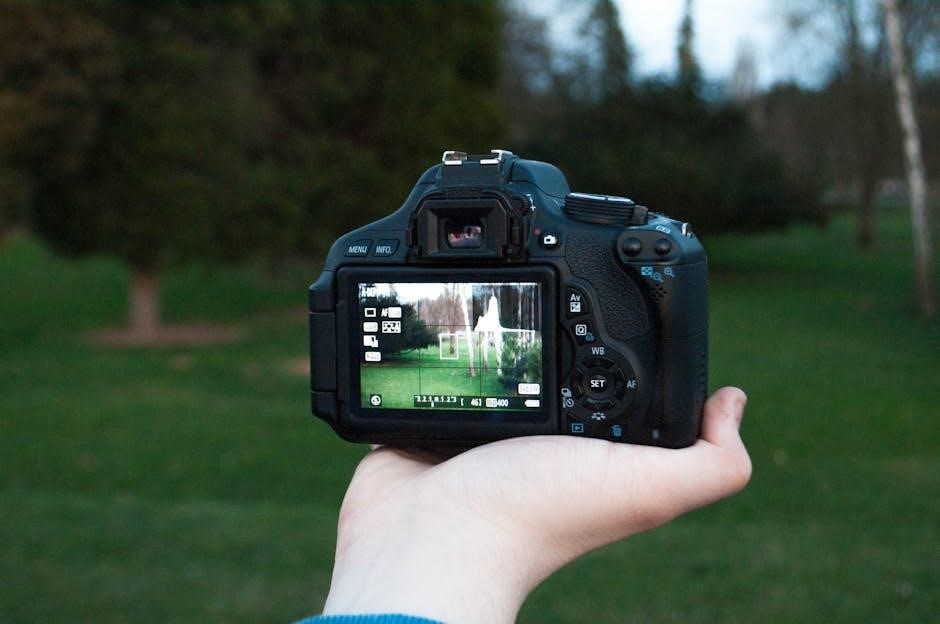
The rear panel of the Nikon D3300 is dominated by the 3.0-inch LCD screen, used for live view shooting, image review, and menu navigation. Below the screen are buttons for menu access, image playback, and the “i” button for quick access to frequently used settings.
The directional pad allows for navigating menus and selecting focus points. The AF-ON button initiates autofocus, independent of the shutter button. The exposure compensation button adjusts brightness. The delete button removes unwanted images. Understanding these controls is crucial for efficient camera operation.
Familiarize yourself with the button layout for quick adjustments while shooting.
Mode Dial Explained
The Mode Dial on the D3300 is your gateway to different shooting experiences. ‘Auto’ offers full automation, ideal for beginners. ‘P’ (Program) provides semi-automatic control, letting the camera handle aperture and shutter speed while you adjust ISO and white balance.
‘A’ (Aperture Priority) lets you control depth of field, while ‘S’ (Shutter Priority) governs motion blur. ‘M’ (Manual) grants full creative control over both aperture and shutter speed. Scene modes like Portrait, Landscape, and Sports optimize settings for specific situations.
Experiment with each mode to understand its strengths and how it impacts your images.
Essential Photography Concepts
Understanding core concepts is crucial for moving beyond automatic settings. The Exposure Triangle – Aperture, Shutter Speed, and ISO – dictates how light impacts your image. Aperture controls depth of field, influencing how much of the scene is in focus. Shutter speed determines motion blur, freezing or blurring moving subjects.
ISO measures the camera’s sensitivity to light; higher ISOs are useful in low light but can introduce noise. Mastering these elements allows for creative control. Don’t be afraid to experiment with different settings to see their effects!
Beginner photographers should focus on these fundamentals.
The Exposure Triangle: Aperture, Shutter Speed, and ISO
The Exposure Triangle represents the three key settings controlling brightness and visual effects in your photos. Aperture, measured in f-stops (like f/2.8 or f/8), controls the lens opening, impacting depth of field. Shutter Speed, in seconds or fractions of a second, determines how long the sensor is exposed to light, affecting motion blur.
ISO dictates the camera’s sensitivity to light; lower ISOs (like 100) produce cleaner images, while higher ISOs (like 3200) are useful in low light but introduce noise. These three elements are interconnected – changing one requires adjusting others to maintain proper exposure.
Aperture and Depth of Field
Aperture, expressed as an f-number (e.g., f/1.8, f/5.6), controls the lens opening size. A lower f-number (like f/1.8) creates a shallow depth of field – blurring the background and isolating your subject, ideal for portraits. Conversely, a higher f-number (like f/16) yields a large depth of field, keeping everything in focus, perfect for landscapes.
The D3300’s kit lens offers a variable aperture. Understanding how aperture impacts your images is crucial for creative control. Experiment with different f-stops to see how they affect background blur and overall sharpness.

Shutter Speed and Motion Blur
Shutter speed dictates how long the camera’s sensor is exposed to light, measured in seconds or fractions of a second (e.g., 1/200s, 1s). Fast shutter speeds (like 1/1000s) freeze motion, capturing sharp images of fast-moving subjects. Slow shutter speeds (like 1/30s or longer) allow motion blur, conveying a sense of movement or creating light trails.
Experimenting with shutter speed on your D3300 is key. Use faster speeds for sports or wildlife, and slower speeds for artistic effects like silky water. Remember that slower speeds require a tripod to avoid camera shake, resulting in blurry images.

ISO and Image Noise
ISO measures your camera sensor’s sensitivity to light. Lower ISO settings (like 100 or 200) produce cleaner images with less noise, ideal for bright conditions. Higher ISO settings (like 800, 1600, or higher) increase sensitivity, allowing you to shoot in low light, but introduce image noise – grainy or speckled imperfections.
On the Nikon D3300, find the optimal balance. Start with the lowest possible ISO and increase it only when necessary to achieve a proper exposure. Be mindful that higher ISOs can reduce image quality, so consider using a tripod and slower shutter speed first.
Shooting Modes
The Nikon D3300 offers various shooting modes to suit different skill levels and scenarios. Auto Mode provides effortless point-and-shoot simplicity, letting the camera handle all settings. Program Mode (P) offers semi-automatic control, allowing adjustments to white balance and picture control.
For more creative control, explore Aperture Priority (A/Av) to manage depth of field, and Shutter Priority (S/Tv) to capture motion. Finally, Manual Mode (M) grants full creative control over aperture, shutter speed, and ISO. Don’t feel pressured to immediately use manual; prioritize understanding the other modes first!
Auto Mode: Point-and-Shoot Simplicity
Auto Mode on the Nikon D3300 is designed for ultimate ease of use, perfect for beginners or quick snapshots. Simply point the camera at your subject and press the shutter button – the camera automatically selects the optimal settings for exposure, focus, and white balance.
This mode eliminates the need to understand complex photographic concepts initially, allowing you to focus on composition and capturing the moment. While it offers convenience, remember that Auto Mode limits creative control. As you gain confidence, explore other modes to unlock the D3300’s full potential.
Program Mode (P): Semi-Automatic Control
Program Mode (P) offers a balance between automatic convenience and creative control. The camera sets both aperture and shutter speed, but allows you to adjust ISO, white balance, and exposure compensation. This is a step up from Auto Mode, providing more flexibility without the complexity of fully manual settings.
Program Mode is ideal for situations where you want the camera to handle the technical aspects while you fine-tune the overall look of your images. It’s a great starting point for learning how different settings impact your photos, bridging the gap towards aperture or shutter priority modes.
Aperture Priority Mode (A/Av): Controlling Depth of Field
Aperture Priority (A/Av) mode lets you select the aperture (f-stop), while the camera automatically adjusts the shutter speed for proper exposure. This is crucial for controlling depth of field – the area in your image that appears sharp. A lower f-stop (e.g., f/1.8) creates a shallow depth of field, ideal for portraits with blurred backgrounds.
Conversely, a higher f-stop (e.g., f/16) yields a greater depth of field, perfect for landscapes where you want everything in focus. Experiment with different apertures to see how they affect your images, understanding the relationship between f-stop and background blur.
Shutter Priority Mode (S/Tv): Capturing Motion
Shutter Priority (S/Tv) mode empowers you to dictate the shutter speed, while the camera adjusts the aperture accordingly. This is essential for controlling how motion is depicted in your photographs. Fast shutter speeds (e.g., 1/1000s) freeze action, perfect for sports or wildlife photography.
Slower shutter speeds (e.g., 1/30s) create motion blur, conveying a sense of movement, ideal for waterfalls or light trails. Remember that slower speeds require a stable camera (tripod recommended) to avoid overall image blur. Practice with various shutter speeds to master capturing or implying motion effectively.
Manual Mode (M): Full Creative Control
Manual (M) mode grants complete control over both aperture and shutter speed, demanding a thorough understanding of the exposure triangle. While initially daunting, it unlocks your full creative potential. You independently set the ISO, aperture, and shutter speed to achieve your desired exposure and artistic effect.
Don’t be discouraged by the learning curve! Many professionals utilize manual mode for specific situations, even if they often shoot in semi-automatic modes. It’s about understanding how the camera responds to your settings. Ignore the pressure to always shoot in manual; use it when you want ultimate control.
Focusing and Autofocus Settings
Achieving sharp images relies on mastering the D3300’s focusing system. The camera offers several Autofocus (AF) modes. Single-Servo (AF-S) is ideal for stationary subjects, locking focus when the shutter button is half-pressed. Continuous-Servo (AF-C) tracks moving subjects, continuously adjusting focus.
Focus Area Modes determine where the camera focuses. Single-Point AF lets you select a specific focus point. Dynamic-Area AF uses surrounding points if the initial point loses the subject. Auto-Area AF lets the camera choose, but can be less precise. Don’t hesitate to explore Manual Focus for precise control, especially in challenging situations.
Autofocus Modes: Single-Servo (AF-S) and Continuous-Servo (AF-C)
Understanding AF-S and AF-C is crucial for sharp photos. Single-Servo (AF-S), indicated by AF-S on the top display, is best for still subjects. Half-press the shutter button to lock focus, then fully press to capture the image. It’s a “one-shot” focus.
Continuous-Servo (AF-C), shown as AF-C, excels with moving subjects. The camera continuously tracks focus as long as you half-press the shutter. This is ideal for sports, wildlife, or children. Experiment with both modes to see which best suits your shooting style and subject matter. Remember to select the appropriate mode in the camera’s settings menu.
Focus Area Modes: Single-Point, Dynamic-Area, and Auto-Area

Nikon D3300 offers several Focus Area Modes for precise focusing. Single-Point AF lets you select one focus point, ideal for stationary subjects where you need pinpoint accuracy. Dynamic-Area AF uses a cluster of focus points around your selected point, tracking moving subjects within that area.
Auto-Area AF allows the camera to automatically select focus points, useful for general photography when you don’t have time to choose. Experiment with these modes to find what works best for different scenarios. Adjust these settings via the Quick Menu for quick access during shooting.
Manual Focus Techniques
Manual Focus on the Nikon D3300 provides ultimate control, especially in challenging situations where autofocus struggles. Switch to MF on the lens and use the focusing ring to sharpen the image. Utilize Live View and zoom in to 100% for critical focus confirmation.
The focus peaking feature (if available via firmware update) highlights in-focus areas. Practice with stationary subjects initially, then move to slightly moving ones. Remember, precise manual focus takes practice, but offers creative possibilities beyond autofocus limitations. Don’t be afraid to experiment!
Image Quality and Settings
Image Quality is crucial. Choose RAW for maximum editing flexibility, capturing all sensor data. JPEG offers smaller file sizes, ideal for quick sharing, but with some data loss. Consider your workflow when deciding.
White Balance corrects color casts. Auto White Balance (AWB) works well in many situations, but custom presets (Daylight, Cloudy, Tungsten) offer greater accuracy. Picture Control settings (Standard, Neutral, Vivid) adjust image tone. Experiment to find your preferred style. Understanding these settings unlocks your D3300’s full potential.
Understanding Image Size and Quality (RAW vs. JPEG)
Image size impacts detail and file size. Larger sizes (e.g., Large) capture more detail, suitable for prints and cropping. Smaller sizes (e.g., Small) are efficient for web use. RAW files are uncompressed, preserving all sensor data for extensive editing. They’re larger but offer maximum control.
JPEG files are compressed, reducing file size but discarding some data. They’re convenient for sharing but limit editing flexibility. Choose RAW if post-processing is essential; JPEG for immediate use. Consider storage space and editing needs when selecting your format.
White Balance Settings
White balance (WB) corrects color casts, ensuring accurate colors under different lighting conditions. The D3300 offers presets like Daylight, Cloudy, Fluorescent, and Incandescent. Auto WB generally performs well, but can be inaccurate in mixed lighting.
For precise control, use Custom WB – photograph a white or gray card and set it as your reference. This ensures true-to-life colors. Experiment with presets to achieve desired effects. Incorrect WB results in unnatural hues (e.g., too blue or orange). Mastering WB is crucial for realistic and pleasing images.
Picture Control Settings

Picture Control lets you customize your image’s look in-camera. The D3300 offers Standard, Neutral, Vivid, Monochrome, Portrait, and Landscape presets. Standard is a good all-around choice. Vivid boosts saturation for vibrant colors, while Monochrome creates black and white images.
Each preset allows adjustments to Sharpness, Contrast, Brightness, Saturation, and Hue. Experiment to find settings that match your style. Saving custom Picture Controls ensures consistency. Shooting RAW allows greater flexibility in post-processing, but Picture Controls offer convenient in-camera adjustments.
Lenses and Accessories
The kit lens (18-55mm) is a versatile starting point, ideal for everyday photography. However, exploring additional lenses unlocks creative potential. Consider a 50mm f/1.8 for portraits with beautiful background blur, or a wide-angle lens for landscapes. Lens choice significantly impacts image quality and artistic expression.

Essential accessories include a sturdy tripod for sharp images in low light, fast memory cards (SD cards) for storing photos and videos, and a protective camera bag. Don’t underestimate the importance of a good bag to safeguard your investment during travel and storage.
Kit Lens Overview (18-55mm)
The 18-55mm lens, typically bundled with the D3300, is a fantastic all-rounder. Its zoom range covers wide-angle for landscapes and a moderate telephoto for portraits. It’s lightweight and easy to use, making it perfect for beginners. The aperture varies – typically f/3.5-5.6 – meaning it performs best in good lighting conditions.
While not a professional-grade lens, it delivers sharp images for everyday photography. Learn to utilize its full range by experimenting with different focal lengths and observing the resulting perspective. It’s a great starting point to understand lens characteristics before investing in specialized optics.
Exploring Additional Lenses
Beyond the kit lens, a world of photographic possibilities awaits! Consider a 35mm f/1.8 lens for low-light performance and beautiful bokeh. For wildlife or sports, a 70-300mm zoom offers extended reach. Macro lenses reveal intricate details, while wide-angle lenses capture expansive scenes.
Nikon’s DX format lenses are specifically designed for cameras like the D3300. Research lenses based on your photographic interests. Don’t feel pressured to buy expensive options immediately; used lenses can be a cost-effective way to expand your collection. Each lens brings a unique perspective to your photography.
Essential Accessories: Tripods, Memory Cards, and Bags
Enhance your photography with key accessories! A tripod ensures sharp images in low light and for long exposures. Choose one sturdy enough to support your D3300 and lens. Invest in high-quality SD memory cards – faster cards are crucial for continuous shooting and 4K video (if applicable). Consider capacity; 64GB or 128GB is a good starting point.

Protect your investment with a comfortable camera bag. Options range from shoulder bags to backpacks. Prioritize padding and weather resistance. Extra batteries and lens cleaning cloths are also valuable additions to your kit, ensuring you’re prepared for any shooting situation.
Basic Troubleshooting
Encountering issues? Don’t panic! Common error messages often relate to the lens, memory card, or battery. Consult the camera’s display or the full owner’s manual for specific codes. If the camera won’t power on, check the battery charge and ensure it’s correctly inserted. A fully charged battery is essential for reliable operation.
For image review problems, verify the memory card is properly seated and not full. If images are accidentally deleted, some recovery software may help, but prevention is key. Regularly back up your photos! If issues persist, Nikon’s support website offers extensive resources and FAQs.
Common Error Messages and Solutions
“Lens not attached” indicates a connection issue; reattach the lens firmly. “Memory card error” suggests a faulty or incompatible card – try a different one. “Battery exhausted” requires charging or replacement. “Function not available” often appears with incorrect settings; review your chosen mode and options.
If you see “Check mirror lock-up” ensure it’s disabled unless intentionally used. “File error” may mean a corrupted image; avoid abruptly turning off the camera during writing. For persistent errors, a factory reset (found in the setup menu) can sometimes resolve software glitches, but back up your data first!
Battery Issues and Charging
The Nikon D3300 uses an EN-EL14a battery. Always use the supplied MH-C330 charger. Charging typically takes around 2 hours, indicated by a blinking light that turns solid when complete. Avoid using third-party chargers as they may damage the battery.
If the battery isn’t charging, check the AC adapter connection and try a different outlet. Low battery life can be due to frequent LCD use, live view, or cold temperatures. Consider carrying a spare battery for extended shoots. Store batteries in a cool, dry place when not in use.
Image Review and Deletion
To review photos, press the playback button (the triangle). Use the multi-selector to navigate images. Zoom in using the zoom control to check focus and detail. Deleting images is straightforward: press the delete button (trash can icon) while in playback mode.
Be cautious when deleting! Deleted images are initially sent to a recycle bin and can be restored. To permanently delete and free up space, access the recycle bin from the playback menu and choose “Delete All.” Regularly back up your photos to a computer or external drive to prevent data loss.